When life hands you scraps...turn it into art!

Pages

Thursday, March 31, 2011

Fairy Fail


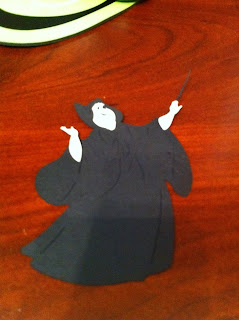
Well, not everything can come out right the first time...or the second for that matter! In sticking with my Disney theme I've got going this week, I thought I'd give Cinderella's Fairy Godmother a shot.

My first attempt was cut at a mere 4"...entirely too small for a character with a pencil thin wand as an accessory :/ Here's her stage by stage progress:


After the first cut at 4" failed miserably, I figured if I enlarged her by a whole 2 1/2 inches it'd be a cinch...boy was I mistaken! When trying to cut her eyes & wand, even at 6 1/2 inches, all it created was a bunch of white DUST. I now know that when it comes to characters like this, it's best to use them in a 12x12 layout so you can cut them at full scale. LESSON LEARNED!


Here is the size comparison of the 4" to the 6 1/2"


Say hello to my little friend

What's a princess without her little friends??? This little guy has to be my favorite of the 7 Dwarf's...it's Dopey! He just has the cutest little face, and when he goes back in the house several times in order to get a kiss from Snow White is just the cutest!


I was talking on the phone while putting him together (it's a very good thing I can't do this in my car), so I forgot to take pictures of the first 2 stages, but you'll get the idea!


Dopey was cut at 4" from the Disney Happily Ever After Cricut Cart. With all the layers these Disney characters have, I wouldn't suggest cutting them any smaller than 4", otherwise you'll run the risk of torn pieces as they come off the mat. I think a 2-page layout with Snow White & all 7 of her Dwarfs is a must...for another day!

Wednesday, March 30, 2011

Some day my prince will come...

I just couldn't stop at ONE princess, so I just had to make another! My son loves this princess just as much as the last...but he sure thinks that hunter in the movie is scary, you'd think the witch would scare the pants off of him, but NOOOOOOOOOO, he thinks she's "nice!" Have you guessed yet, it's SNOW WHITE! She's one of my all-time favorite's too! The only thing I'd suggest is DON'T try assembling these lovely ladies at 11:00 at night, I thought I was going to go blind assembling the small little layers!


Here she is in all her beauty!


Base:


Skin:


Layers, Layers (shift) & Extras:


More "Extras":


Whites:


Eyes:


Snow White was cut at 5" from the Disney Happily Ever After Cartridge.


I hope you've enjoyed watching Snow White come to life! If you see anything on my Blog that you'd just love to have for yourself, shoot me a line at sandiegocoley@yahoo.com. Have a great day!!!

Tuesday, March 29, 2011

Bibbidy-Bobbidy-Boo

Just because I've got a little boy, it doesn't mean I can't create something for a little princess too! I've got something really special in the works for my niece Marley, so this is just a teaser of what's to come! I recently purchased the Happily Ever After cartridge, and when it came in the mail just days later I just had to see what I could create. So as quickly as I could tear the plastic shell of, the cart was in my Expression! Watch Cinderella come alive before your very eyes...it's just like magic!


Base/Skin:


Hair:


Whites/Extras:


Layers:


Layers (shift):


Cinderella was cut at 5" from the Happily Ever After Cricut Cart. Stay tuned, there is more Disney Princess Magic just around the corner...it's off to work we go ;) (That's your hint)

Monday, March 28, 2011

Name that Baby

I've been waiting almost 2 weeks to post this project...I had so much fun creating this special keepsake! My old neighbors (and friends) are having their second baby, just weeks before my second is about to arrive, and I was able to go an celebrate the pending arrival with the beaming Mommy this past weekend! My friends already have an adorable little boy at home, so they have most of what they need for the newest member of the family, so I wanted to give them something unique to have for years to come! I decided on a mini-album, but instead of the word LOVE, or BABY, I went with the NAME :D Here's the final product...


E-T-H-A-N


"T" - New Arrival Page


"H" - the "Announcement" Page


"A" - Plane & Banner


"N" - Choo Choo


The nursery theme is planes, trains & cars, so I wanted to throw in a couple of elements to tie that together. The other pages are just all about baby! Pages & letters were cut from chipboard & covered with scrapbook paper from the stack "All About Boys," seems fitting doesn't it. The dimensions for the book itself are 5" tall, and starting with the first page out, it's 3", 5", 7", 9" & 11" wide. Letters were all cut at 3" x 5". All photo mats fit the standard wallet size photos. Embellishments were cut from the New Arrival & My Community Carts.


If you have any questions on how I created this album, or are interested in purchasing an album for yourself, please contact me at sandiegocoley@yahoo.com


Happy Monday!!! I'll have new posts all week...I'm so excited to share with you!

Thursday, March 24, 2011

Red, White & my baby's Blue's

And so it has begun...my 2 1/2 year old's baby book has pages!!! I was so overwhelmed with the amount of pictures, mementos & paper I had to chose from, that I had a really hard time figuring out where to begin. I ended up starting with a simple holiday layout, 4th of July! I started with a very busy background paper, so I wanted to keep the matting & embellishments very clean and simple. I used only black & white "frames" for the matting around the pictures, and added a little bit more color with a patriotic red, white & blue theme for the simple words/numbers/journaling matting. I played around with some stars I punched out and covered in glitter, but it ended up looking messy...sometimes less is more!


Using the Designer's Calendar Cricut Cartridge I cut the "July 4" and "Independence Day," sizing it to fit the empty space with the Design Studio. For "2009," I used the George & Basic Shapes cart, and welded the numbers together in Design Studio to create a solid date.

Tuesday, March 22, 2011

From Scrapper to Shooter

I've been in super organization mode the past couple of days, gearing up for my biggest project yet...my sons baby book (granted, he's 2 1/2 now). I can't shut my mind off these days, and I blame that mostly on my raging pregnant hormones, so when I woke up at 3:30 a.m. in a complete panic about my ultrasound photos for THIS baby, I wasn't surprised!!! In the mix of all sorts of scattered photos I found this "oldie but goody" pic of myself in 2002 shooting a gun for the very first time (it also happened to be the last time I fired a gun too). Oh, and I did in fact find what I was looking for...and HOUR later.

Monday, March 21, 2011

The Original Scrapbox

Every scrapbookers DREAM...check out "The Original Scrapbox" Facebook page, and right now, the first 10,000 fans are eligible to win this amazing organizational "closet" (that's the only real description I can give it)!

http://www.facebook.com/TheOriginalScrapbox?sk=app_4949752878#!/TheOriginalScrapbox?sk=wall

Good luck to all you scrappers out there!!! Hurry, they've passed the 9,700 mark, so this contest won't be open for much longer!

Saturday, March 19, 2011

A book for Marley

When my sister & brother-in-law announced on my son's 1st birthday that they were expecting a child of their own, I was OVER THE MOON excited. I immediately started brainstorming on how I could document my nieces first year of life in the most creative way. The total book is just over 50 pages, but I've chosen just a few to share...


Baby Shower Layout:


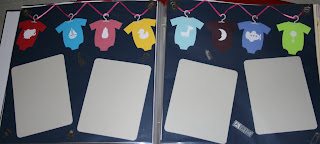
Embellishments for this page were created using the New Arrivals Cricut Cartridge.


Announcement Layout:


"Announcement" was created using the New Arrivals Cricut Cartridge.


1st's Layout:


Embellishments for this layout was created using New Arrivals Cricut Cartridge


Halloween Layout:


Words cut using George & Basic Shapes Cartridge, Spider cut from Doodlecharms & Pumpkin from Speaking of Fall


Thanksgiving Layout:


Embellishments for this layout were created using the Speaking of Fall Cricut Cartridge Christmas Layout:


Embellishments for this layout were created using George & Basic Shapes & Doodlecharms.


Thank you for taking the time to visit Coley's Craft Corner. I hope you've enjoyed today's post. I am in the process of creating an entire "Year in Review" album that will include an Announcement Page, each holiday and a birthday layout. Perfect for a baby shower gift, or to create a special album for that little love in YOUR life! If you are interested in anything you have seen pictured on my blog, please contact me at sandiegocoley@yahoo.com and we can start creating right away!!!

Sign Here


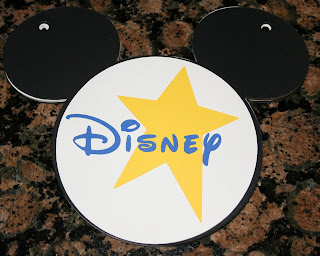
Almost as soon as my son could walk we got annual passes to Disneyland. I grew up going to that magical place A LOT, and I wanted to create some of the same memories for my son. Since I keep scrapbooking in mind when I do nearly everything in life, I wanted to create a fun way to keep track of the characters he met on his many visits to come. I snagged this free Disney Autograph Book step-by-step instruction sheet while cruising through Michael's Craft Store one day, so I decided to give it a go! I made a few modifications because I didn't own all of the cartridges needed, but I like how it turned out anyhow!


Mickey Mouse head created using Mickey & Friends Cricut Cartridge

Disney created using Mickey & Friends Cricut Cartridge

Star created using George & Basic Shapes


If you are interested in purchasing an Autograph book, please contact me at sandiegocoley@yahoo.com Modifications can be made, such as using your child's name instead of the word "Disney."

Friday, March 18, 2011

Magical Memories - Part 2, Tutu goes to the Zoo

Way ahead of schedule (a full week to be exact...patting self on back), and much to my surprise, I am finished with the Magical Memories album!!! The 1st half was Tutu's Trip to the Magical Kingdom (a.k.a. Disneyland), and the 2nd half is our trip to the San Diego Zoo. Her last trip there happens to be the day that my husband and I announced we were having our first baby...this trip, I'm pregnant with our second :D I hope you enjoy taking a mini-trip around the World Famous San Diego Zoo with my family!


Intro Layout:


San Diego Zoo spelled with ZooBalloo Cricut Cartridge

Elephant Odyssey Layout:


Embellishments for this layout were done using Create a Critter & Classic Font

"Popping Up" & Rhino Layout:


"Take 1"


"Take 2" - I like this so much better!!!

Sometimes words just speak for themselves...no embellishments needed!


Stinky Mingo Layout:

Last page left blank for journaling


Thank you so much for taking the time to look at the 2nd half of the Magical Memories Album. If you are interested in an album similar to this, to document more than one special outing with YOUR family, please contact me at sandiegocoley@yahoo.com for more information.

Thursday, March 17, 2011

Magical Memories

Today's post is close to my heart...I recently took my Gram (or Tutu as my son calls her) to Disneyland for the first time in ages. It was such a special day for the three of us, that I wanted to make sure to display it in a extra special way!!! This is only the 1st half of the album, the 2nd half is in progress...stay tuned, it's Tutu's Trip to the Zoo ;)


First Page:


Embellishments made for this page were done using Designer's Calendar & Mickey & Friends Cricut Cartridges


Small World Layout:


Embellishments for this page were done using George & Basic Shapes and Everyday Paper Dolls Cricut Cartridges


Jungle Cruise/Fantasyland Layout:


Embellishments for these pages were done using George & Basic Shapes Cricut Cartridge Pluto/Journal Layout:


Embellishments for these pages were done using Mickey & Friends Cricut Cartridge. The page on the right was left blank intentionally for journaling.


If this post has sparked an interest in your very own Disney album, please contact me at sandiegocoley@yahoo.com and we can start making your magical ideas a reality!!!

Wednesday, March 16, 2011

Mini Mod Podge

While I'm waiting for photos to be printed for one of my current projects, I thought I'd give another mini-album my attention. I bought a pre-cut, 5 page Christmas tree chipboard album at Michaels Craft Store, and decided to use Mod Podge to adhere the paper to the tree. With a few swipes of the sponge brush and little mess, the paper was on and I could easily cut away the excess with a craft knife.


Before Mod Podge:


After Mod Podge:


Now onto the fun part...embellishing!


Cover:


Page 1/2:


Page 3/4:


Page 5/6:


Page 6/7:


Embellishments were cut using the Doodlecharms & Stretch Your Imagination Cricut Cartridges. All photo mats are cut to fit a standard wallet size photo.


If you are interested in purchasing THIS particular album, or would like something similar, please feel free to contact me via e-mail at sandiegocoley@yahoo.com


Happy crafting!!!